Button
This article explains how to create & work with a Button field.
The Button Field allows users to create interactive buttons within their tables. These buttons can trigger specific actions, making workflows more dynamic and efficient. With the Button Field, you can navigate to external URLs, run custom webhooks, or even run custom scripts with a single click.
NocoDB currently supports following actions for the Button Field:
- Open URL: Opens a new tab with a URL generated by a formula within the button field. The URL can be static or dynamic based on the current record's data.
- Run Webhook: Trigger a webhook with the configured URL & custom payload. Payload can include data from the current record.
- Run Script: Execute a custom script that can perform various operations on the current record or the entire table. Current record information can be accessed using the
rowvariable in the script.
Create a Button Field
- Click on the
+icon to the right of theFieldsheader. - In the dropdown modal, enter the field name (optional).
- Select the field type as
Buttonfrom the dropdown. - Configure the button appearance settings as needed. This includes the button text, color, and icon.
- Select the action type from the dropdown.
- Configure the button action settings as needed. This depends on the action you want the button to perform
- Open URL: Use the formula editor to create dynamic URLs.
- Run Webhook: Select a webhook from the dropdown OR create a new webhook by clicking on the
+icon. - Run Script: Select a script from the dropdown.
- Click on the
Save Fieldbutton.
Button URL

Button Webhook

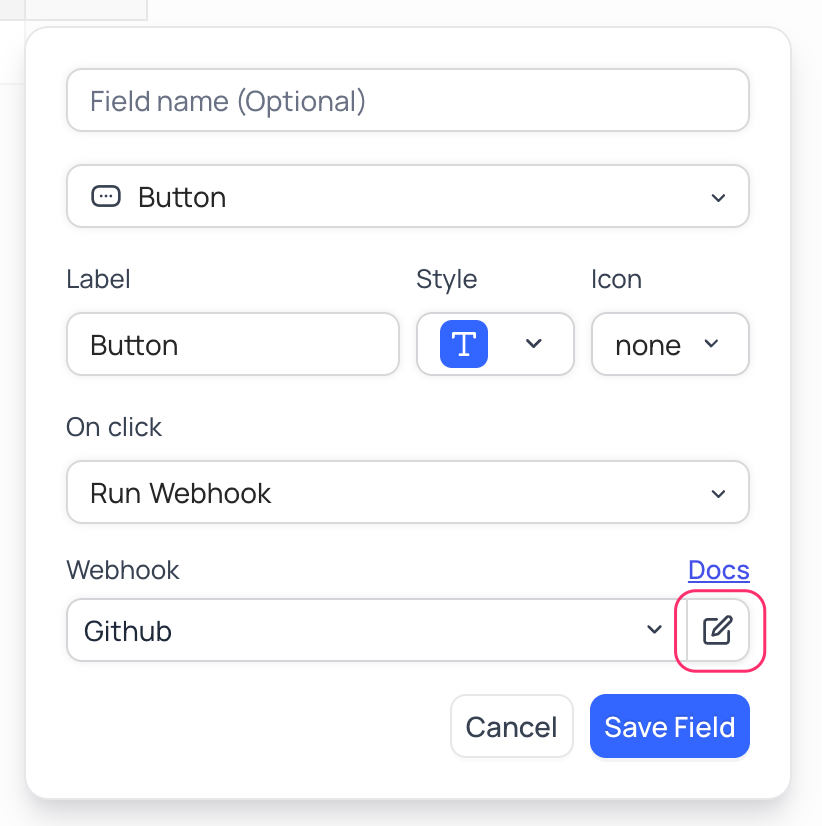
Edit Webhook
To edit a webhook, click on the Edit icon next to the webhook name in the Button field settings. This will open the webhook settings modal, where you can edit the webhook URL, method, headers, and payload. Click on the Save changes button to save the changes.

Created webhook can be accessed by using the Webhook section in details tab. For more details, refer to the following articles:
Button Script

Also termed as "Row Actions", Button Scripts let you trigger pre-configured actions directly from a record in Grid / Kanban / Gallery views. Instead of manually editing fields to update values like status or stage, you can now perform repetitive updates in a single click.
Each button is configured to execute a Frontend Script that updates the record or performs other automated actions. When a user clicks the button, the configured script runs in the context of that record.
Sample Script to update a field value:
const recordID = cursor?.row?.id;
const table = await base.getTable("Table-1");

if(recordID) {
    // Perform operations if recordID is valid
    console.log(`Record ID is: ${recordID}`);

    // You can add more logic here based on your requirements
    await table.updateRecordAsync(recordID, {
        "Status": "Completed",
        "Title": "Default Title"
    })
} else {
    // Handle the case where recordID is undefined or null
    console.error('Record ID is not defined');
}
Conditional Buttons ☁
By default, a button is always enabled for every record in the table. With Visibility Conditions, you can control when a button is active on a per-row basis. When the conditions are not met for a particular record, the button appears disabled with a "Conditions not met" tooltip, preventing any accidental clicks.
This is useful when you want a button action to only be available under certain circumstances — for example, enabling an "Approve" button only when a status field is set to "Pending", or allowing a "Send Invoice" button only after the amount exceeds a threshold.
Visibility conditions work with all button action types — Open URL, Run Webhook, and Run Script.

Setting up visibility conditions
- Open the button field configuration (create a new button field or edit an existing one).
- Scroll down to the Visibility condition section and expand it.
- Click Add filter to define one or more conditions based on fields in the current table.
- Use Add filter group to combine multiple conditions with AND/OR logic.
- Click Save Field to apply.

Once configured, each row in the table is evaluated against the defined conditions:
- Condition met: The button is enabled and clickable.
- Condition not met: The button is disabled and displays a "Conditions not met" tooltip on hover.

Editing or removing visibility conditions
To modify existing conditions, open the button field configuration and update the filters in the Visibility condition section. To remove all conditions and make the button always active, clear all filters and save the field.