Filtering records
Learn how to filter records in NocoDB.

Filters help you narrow down and organize data based on specific conditions. NocoDB supports:
- Nested filters: Combine multiple conditions across different fields.
- AND / OR logic: Choose how filters are grouped.
Use filters to focus only on the records that matter to you.
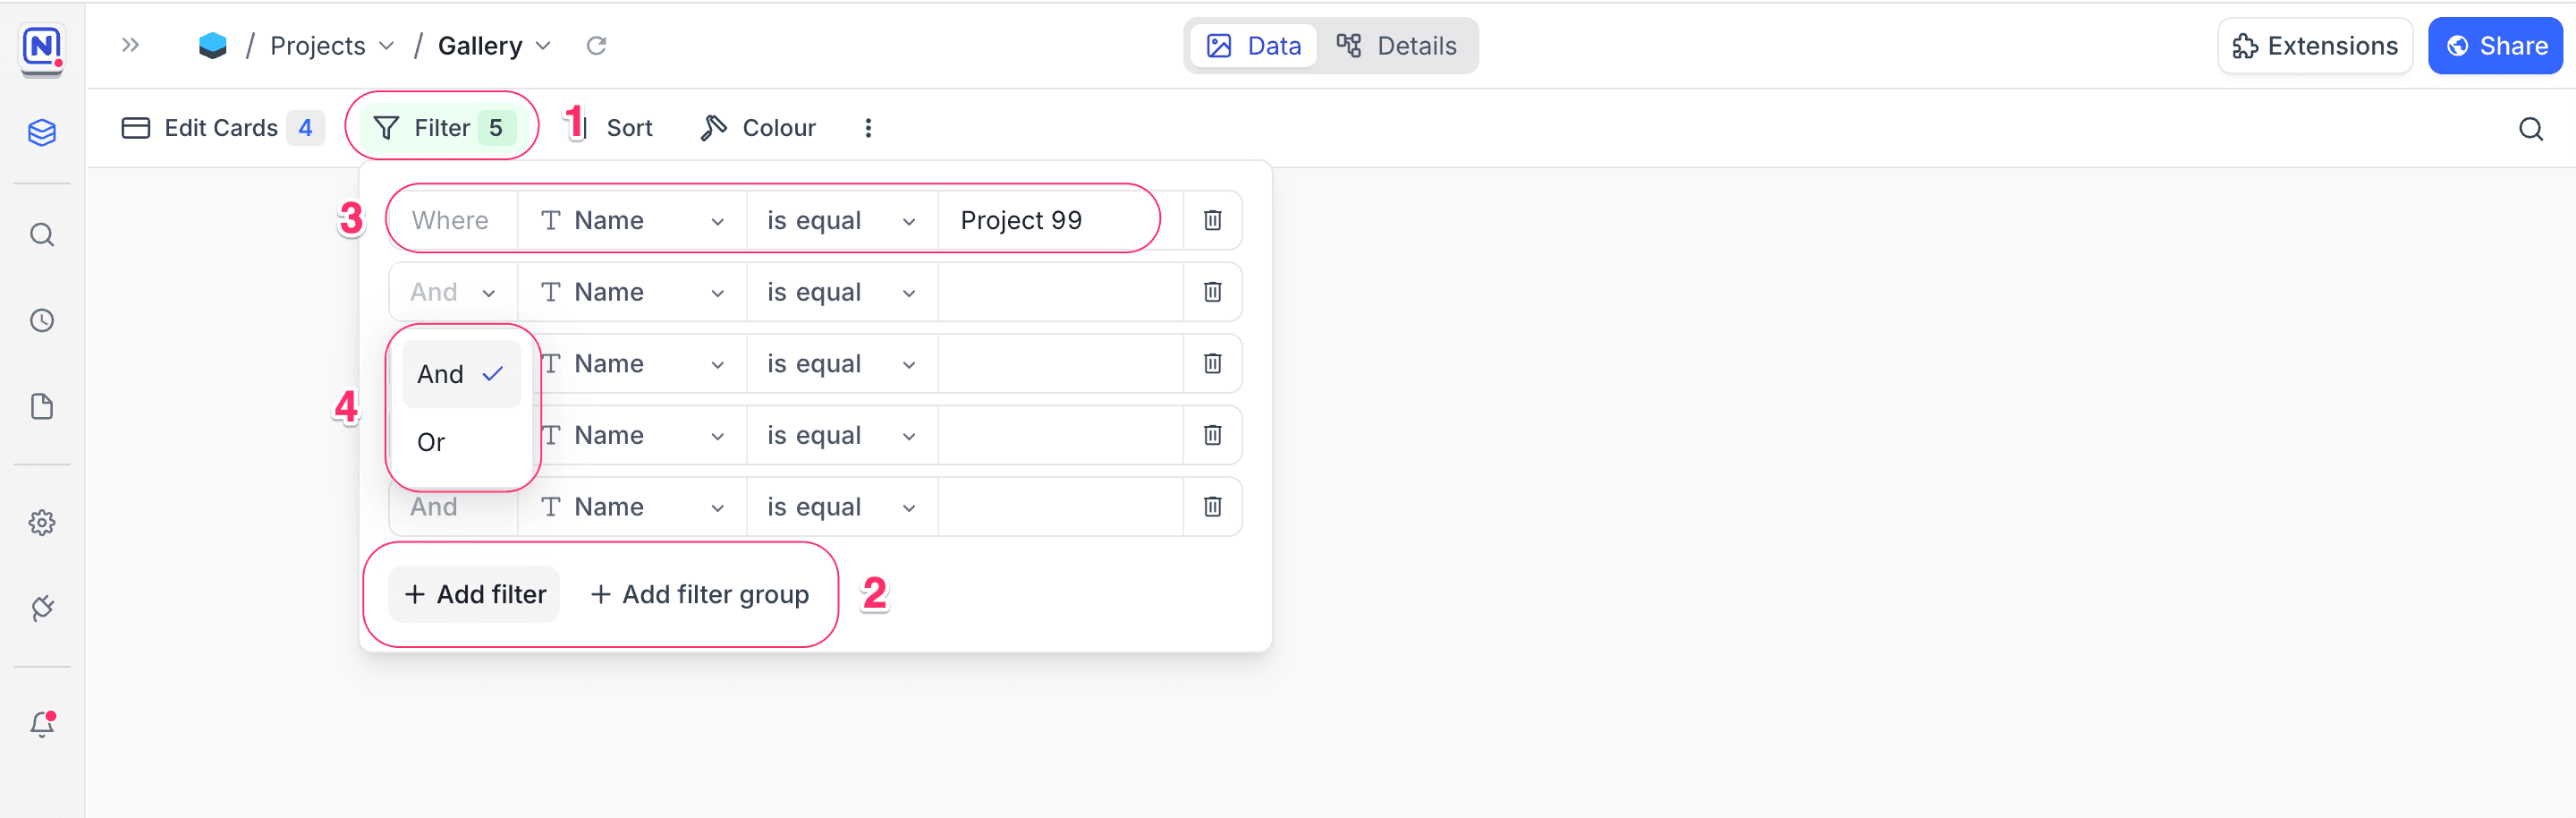
Add or edit filters
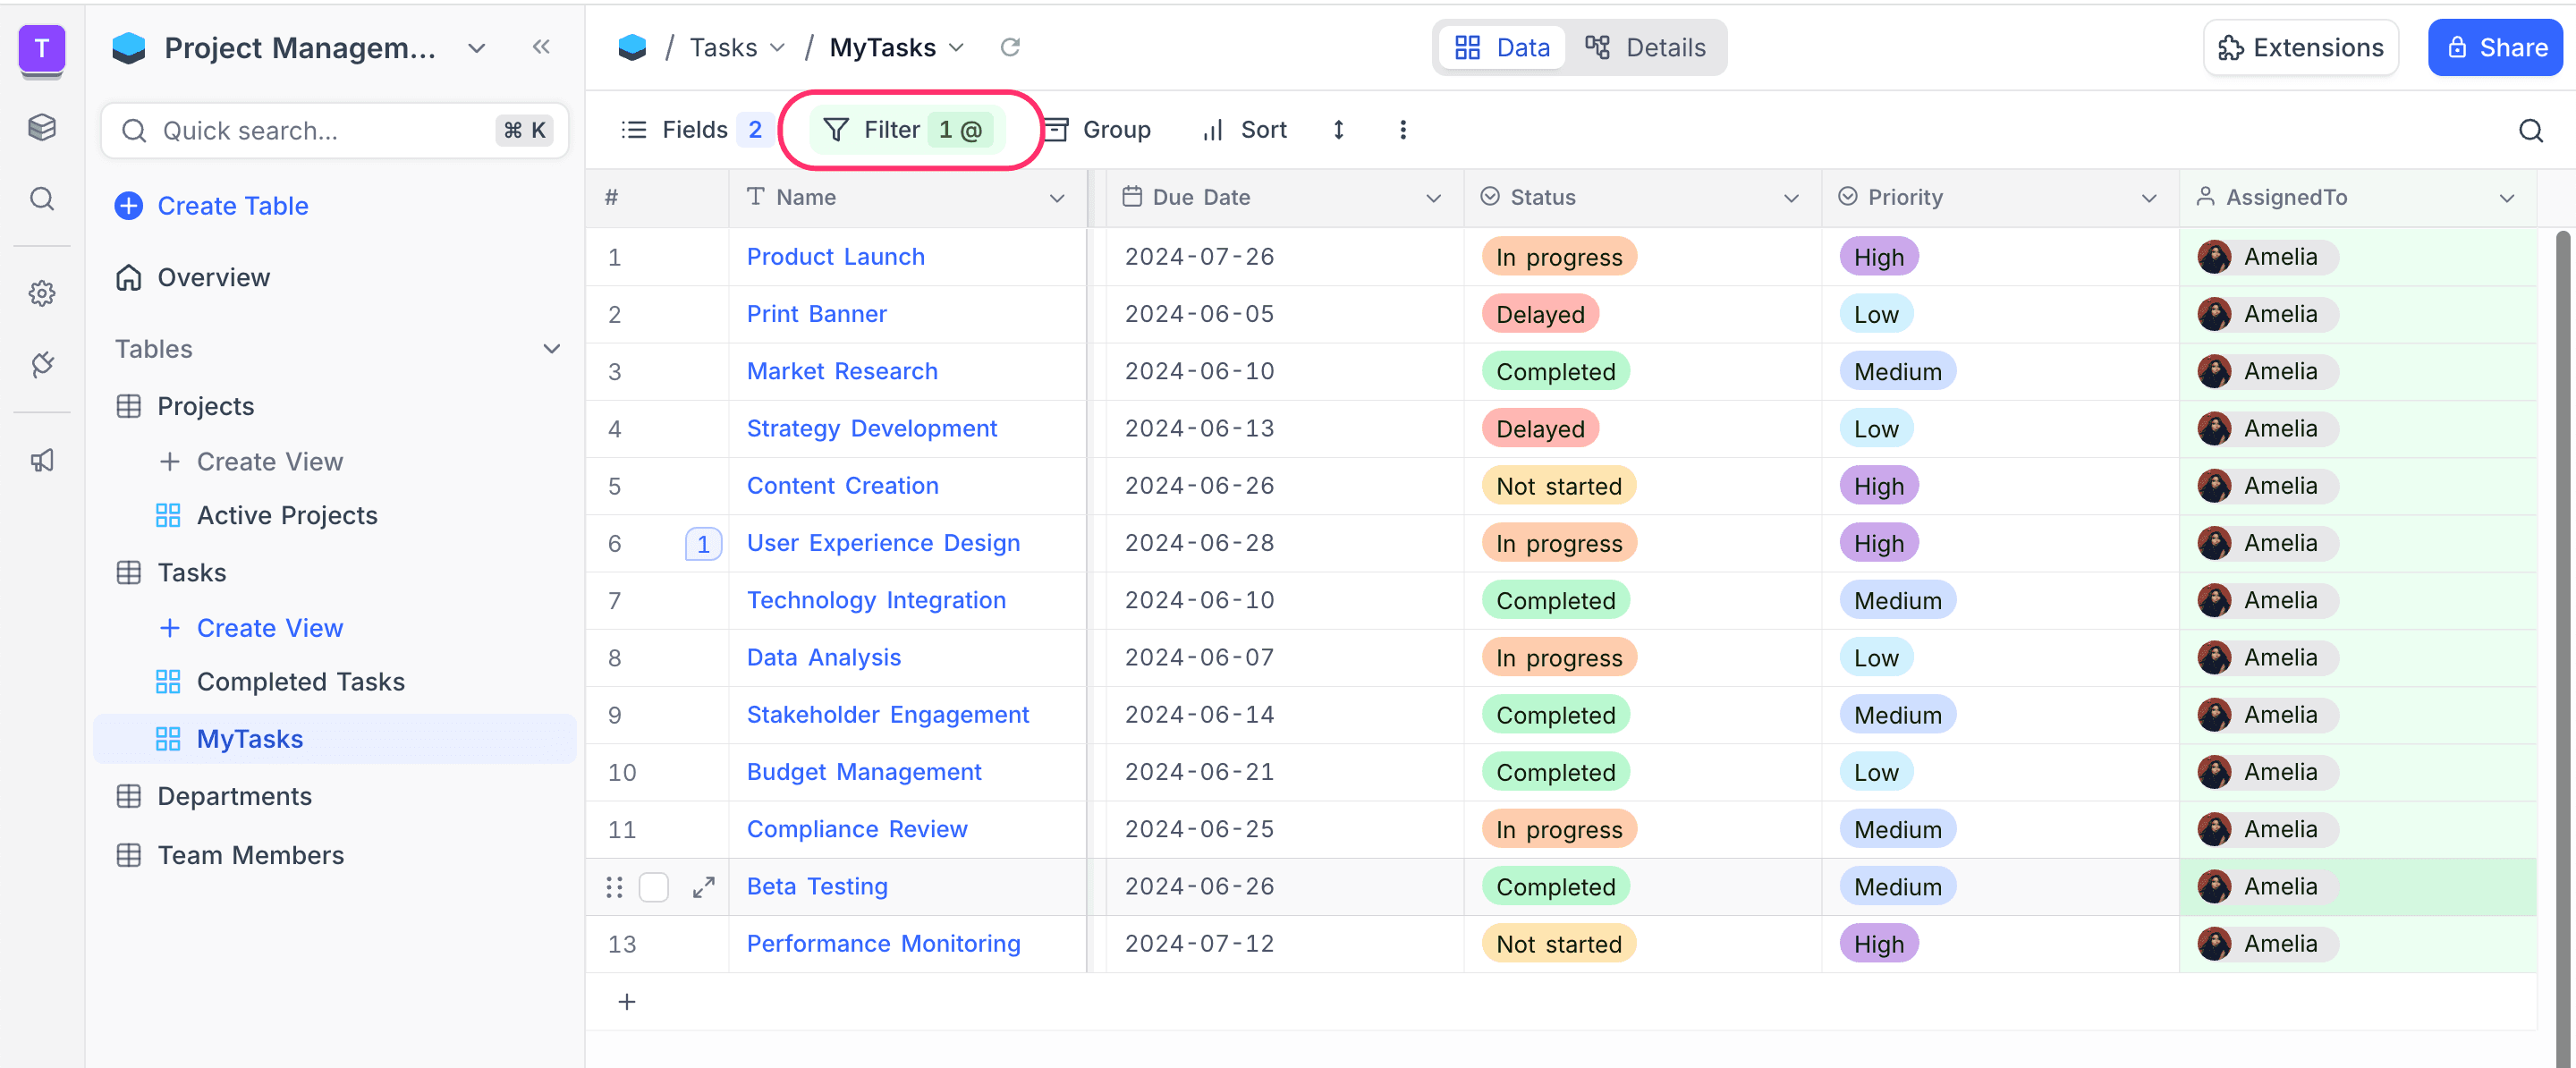
- Click the Filter button in the toolbar.
- Choose Add filter or Add filter group.
- Set up each filter by selecting a Field, Operation, and (if needed) a Value.
- To refine results further, combine multiple filters using AND or OR logic.
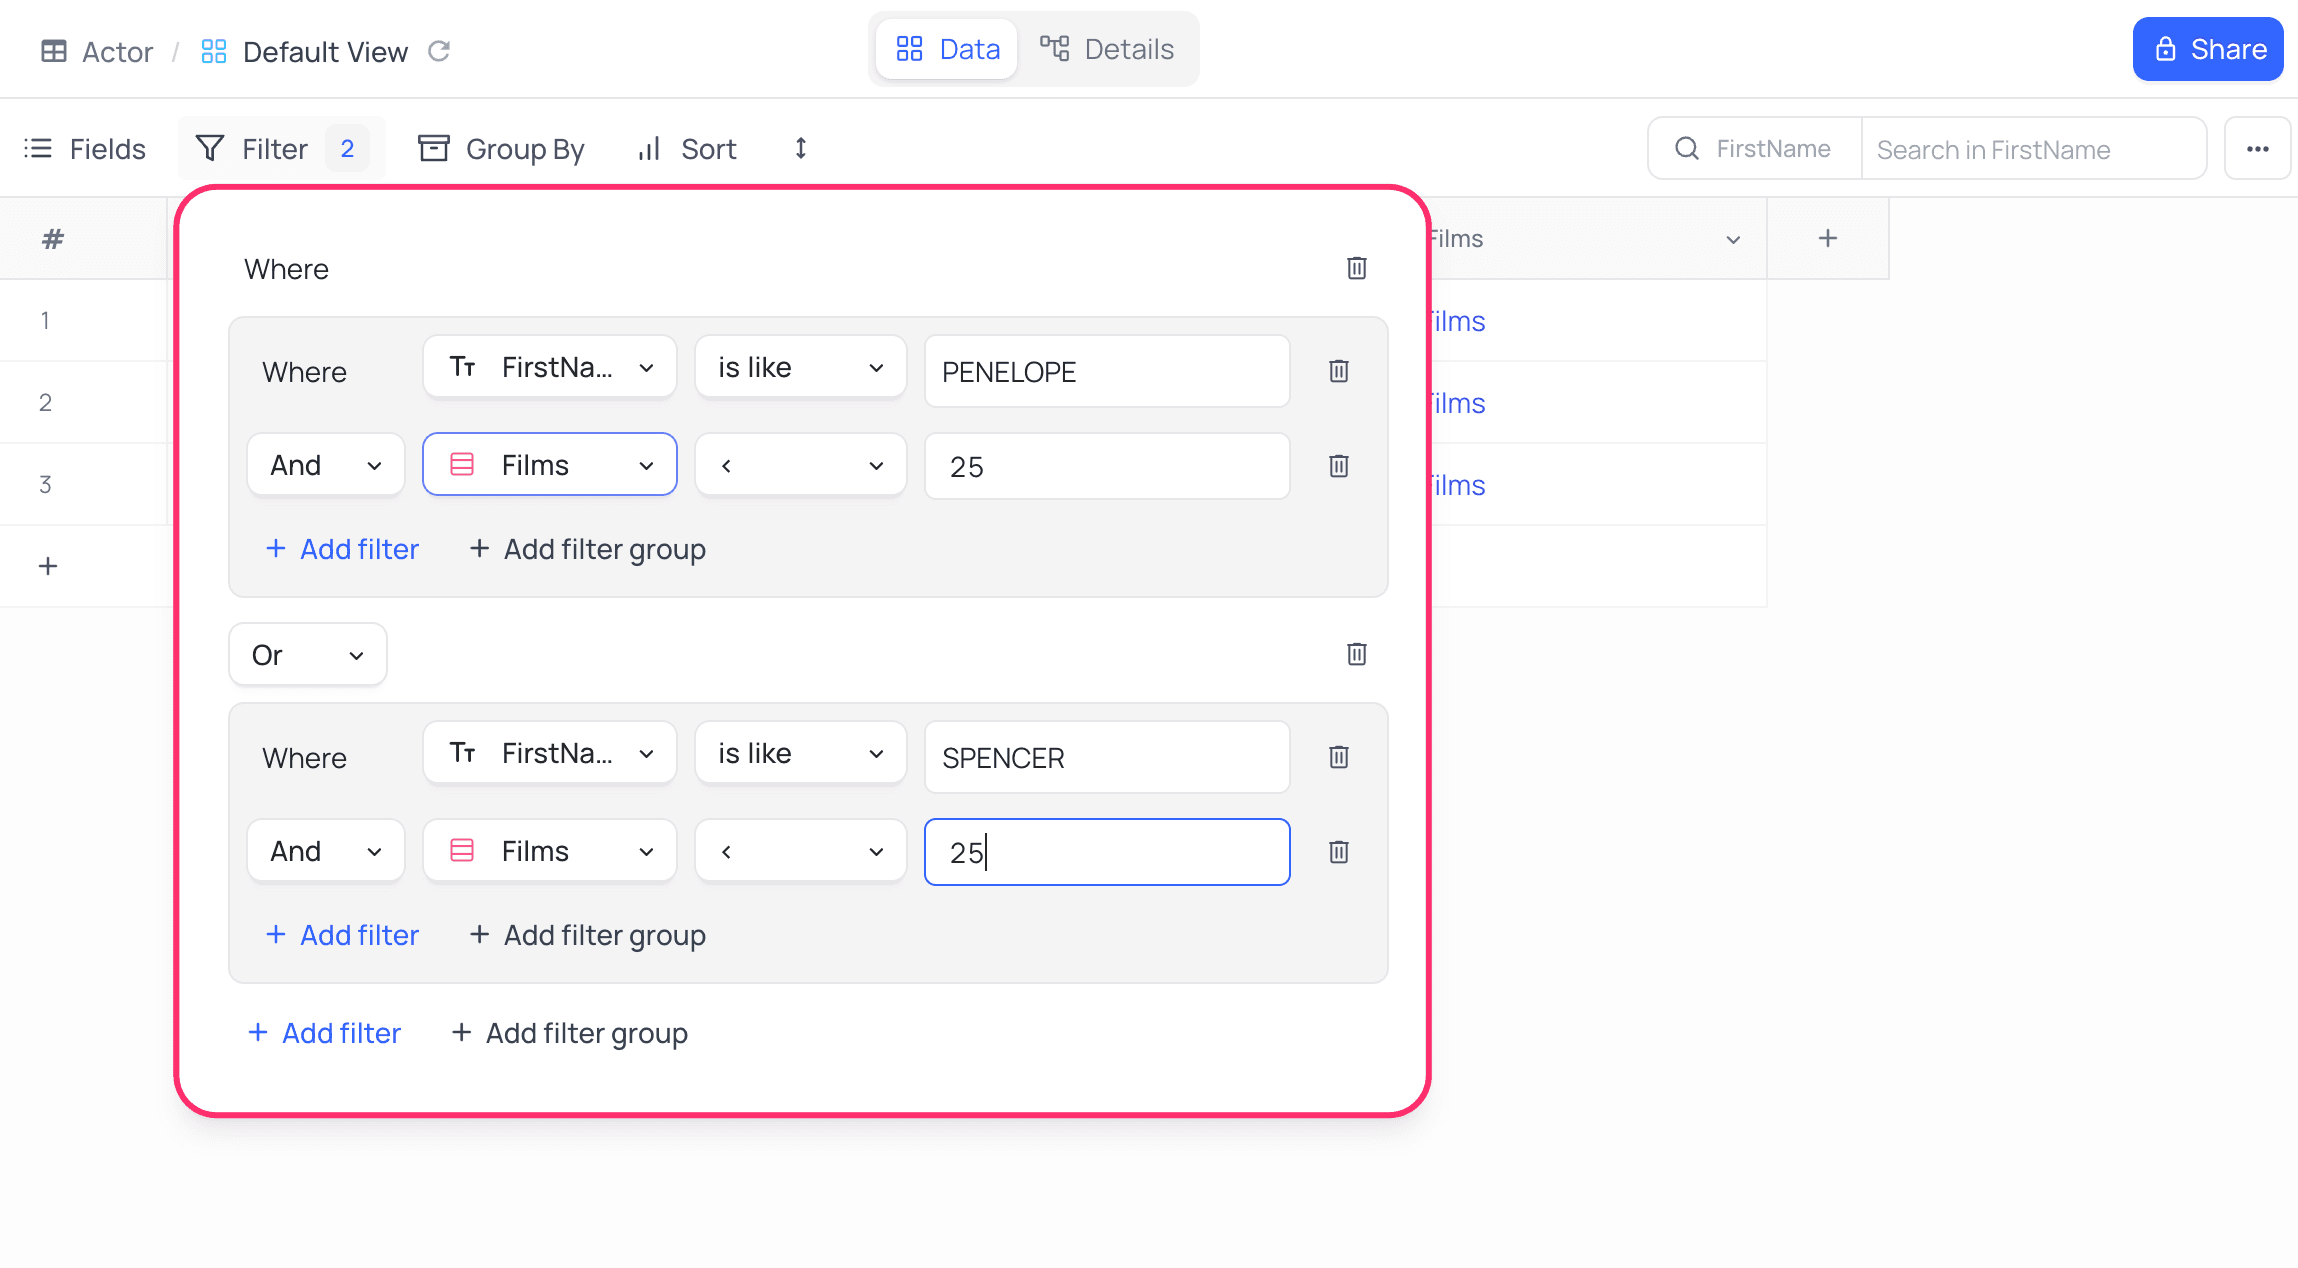
Group filters
You can group multiple filters together using a Filter Group to build complex, nested conditions. This allows you to combine filters using either AND or OR logic, enabling more precise control over your data. To create a filter group, click the Filter button in the toolbar and choose + Add filter group. Within a group, you can add individual filters or even nest additional groups.
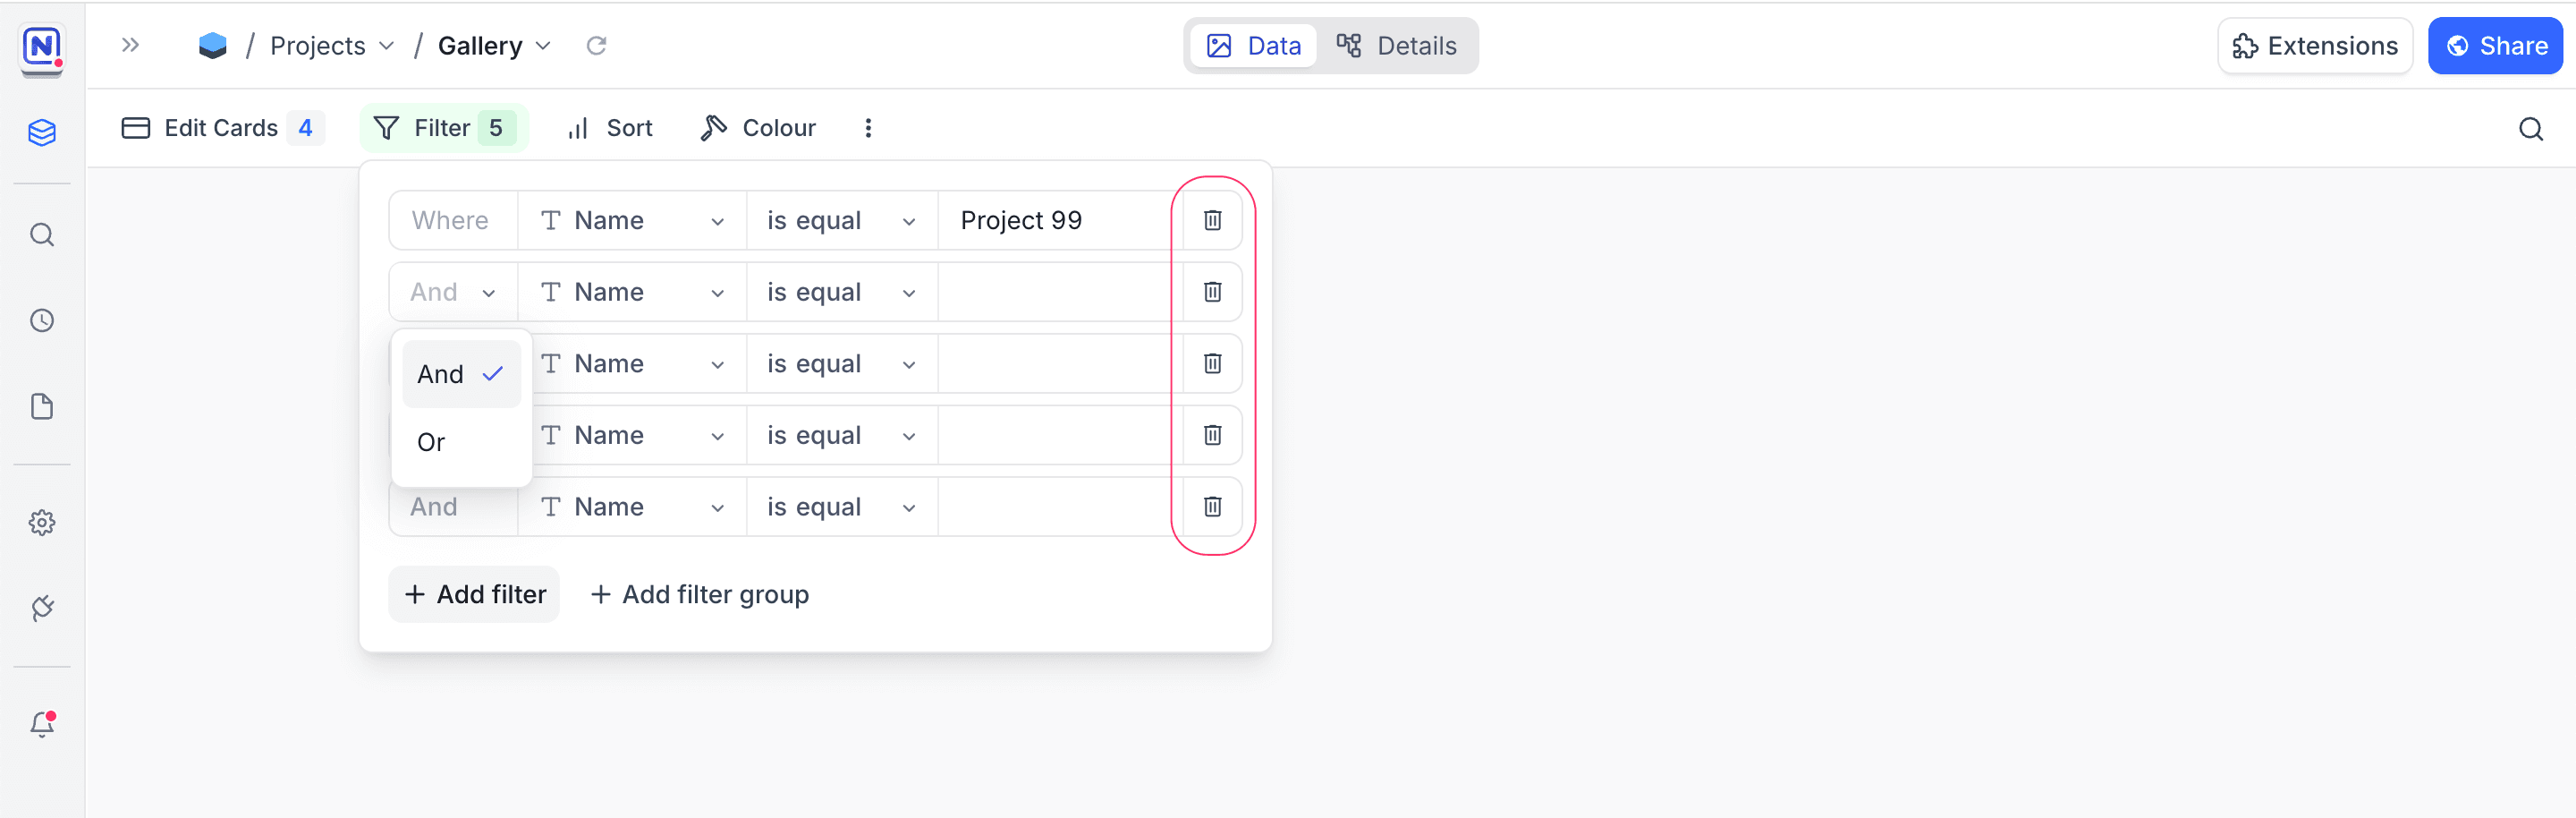
Delete filters
To remove a filter, click on the trash / bin icon located to the right of the respective filter.
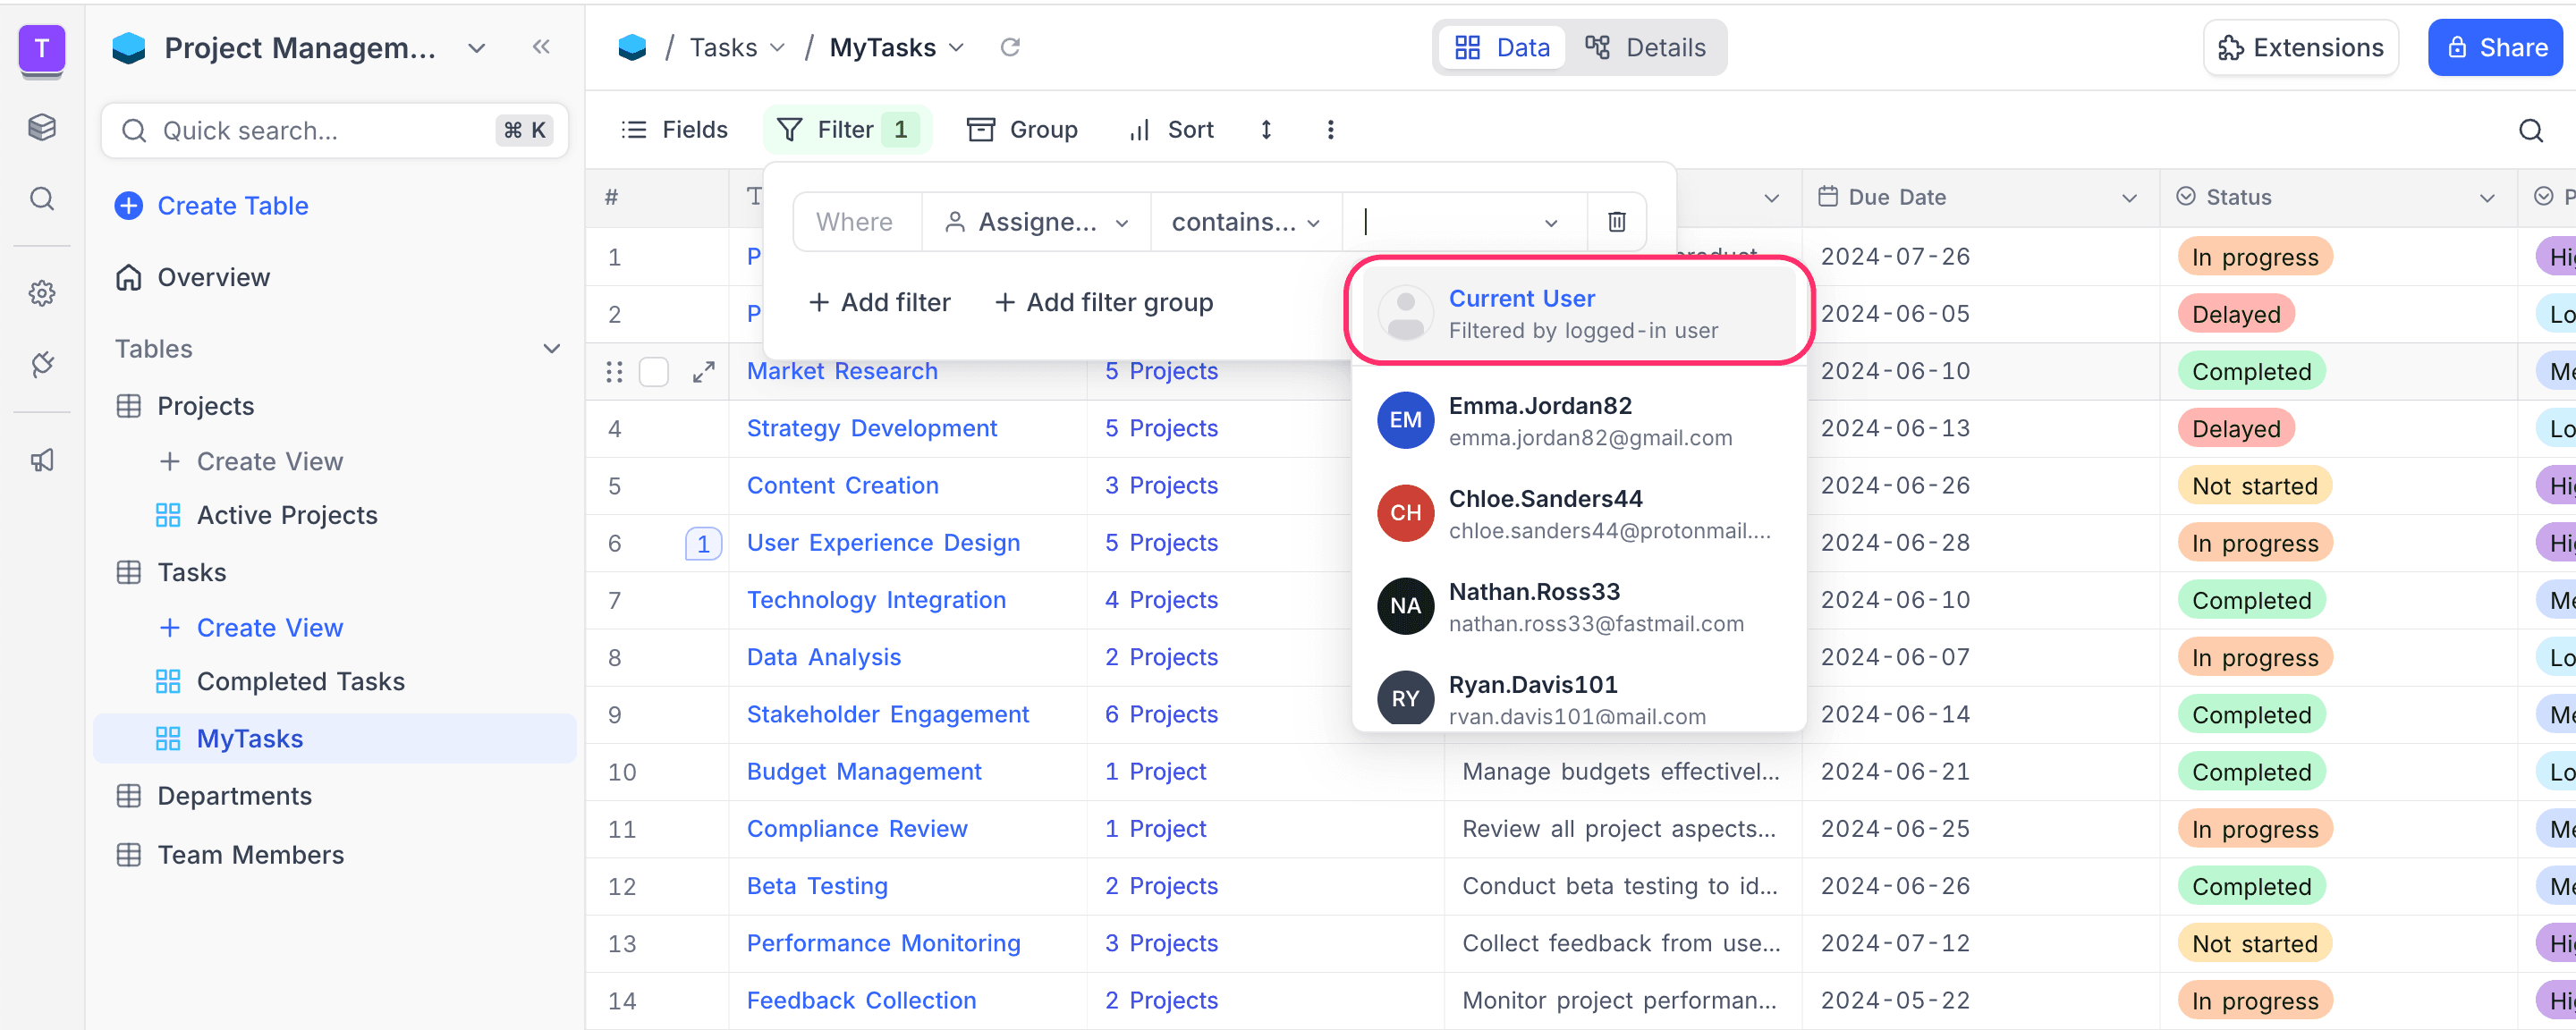
Filter by current user ☁
You can filter records based on the currently logged-in user using the Current User option when configuring filters on User fields and their derivatives (such as createdBy and updatedBy). This is especially useful for creating views that show only the records relevant to the user viewing them.
When a dynamic Current User filter is applied, the toolbar shows an @ icon next to the filter count as an indicator.
Toggle filters ☁
Toggle filters let you temporarily enable or disable individual filters without deleting them. This is useful when you want to quickly compare filtered and unfiltered views, or try different combinations of conditions without rebuilding them each time.
Each filter row includes a checkbox on the left side. Unchecking it disables the filter — the condition is preserved but no longer applied to the view. The toolbar badge shows a count in the format enabled/total (e.g., 2/5) when some filters are disabled, so you always know how many are active.

Toggle filters work with both individual filters and filter groups. When a filter group is disabled, all filters within that group are also disabled. Disabled filters remain saved in the view and can be re-enabled at any time.
Pinned filters ☁
Pinned filters give you quick, one-click access to frequently used filters directly from the toolbar — without needing to open the filter menu. A pinned filter appears as a compact pill in the toolbar showing the field name and current value. Clicking the pill opens a dropdown where you can search and change the value instantly.

Pin a filter
- Click the Filter button in the toolbar and locate the filter you want to pin.
- Click the Pin icon to the right of the filter row.
- The filter appears as a pill in the toolbar, ready for quick access.
To unpin a filter, click the Pin icon again on the filter row — it will be highlighted for pinned filters.
Using pinned filters
Clicking a pinned filter pill opens a dropdown panel directly in the toolbar. From here you can search for values, select or deselect options, and changes are applied to the view immediately. The dropdown also includes a Clear value option to reset the filter.

Each pill includes a toggle icon to quickly enable or disable the filter without opening the filter menu.
Negated operators
When a pinned filter uses a negated operator (e.g., is not, is not any of), the pill displays a diagonal strikethrough line over the selected values. This visual cue makes it easy to distinguish between inclusive and exclusive filters at a glance.

Supported field types
Pinned filters are supported for the following field types:
- Single Select
- Multi Select
- User
- Created By
- Last Modified By
Limitations
Only one filter per field can be pinned at a time — if a field already has a pinned filter, additional filters on the same field cannot be pinned. Filter groups cannot be pinned; only individual filters support pinning.
Filters for editor role
Editors have full control over filters on views they can write to — collaborative views and their own personal views. They can add, edit, delete, toggle, and pin filters just like creators.
On views editors cannot write to — locked views and other users' personal views — the filter popup shows the view's saved filters as a single read-only list. The "+ Add filter" button and per-row edit, delete, toggle, and pin controls are hidden. If the view has no saved filters, a "No filters applied" empty state is shown.
In publicly shared views, filters and sorts applied from the toolbar are interactive but not persisted — they reset when the shared view is reopened.
Enabling NULL and EMPTY filters
By default, filters like is null, is not null, is empty, and is not empty are hidden in the filter menu. To use them explicitly, go to Base settings and enable Show NULL and EMPTY filter.
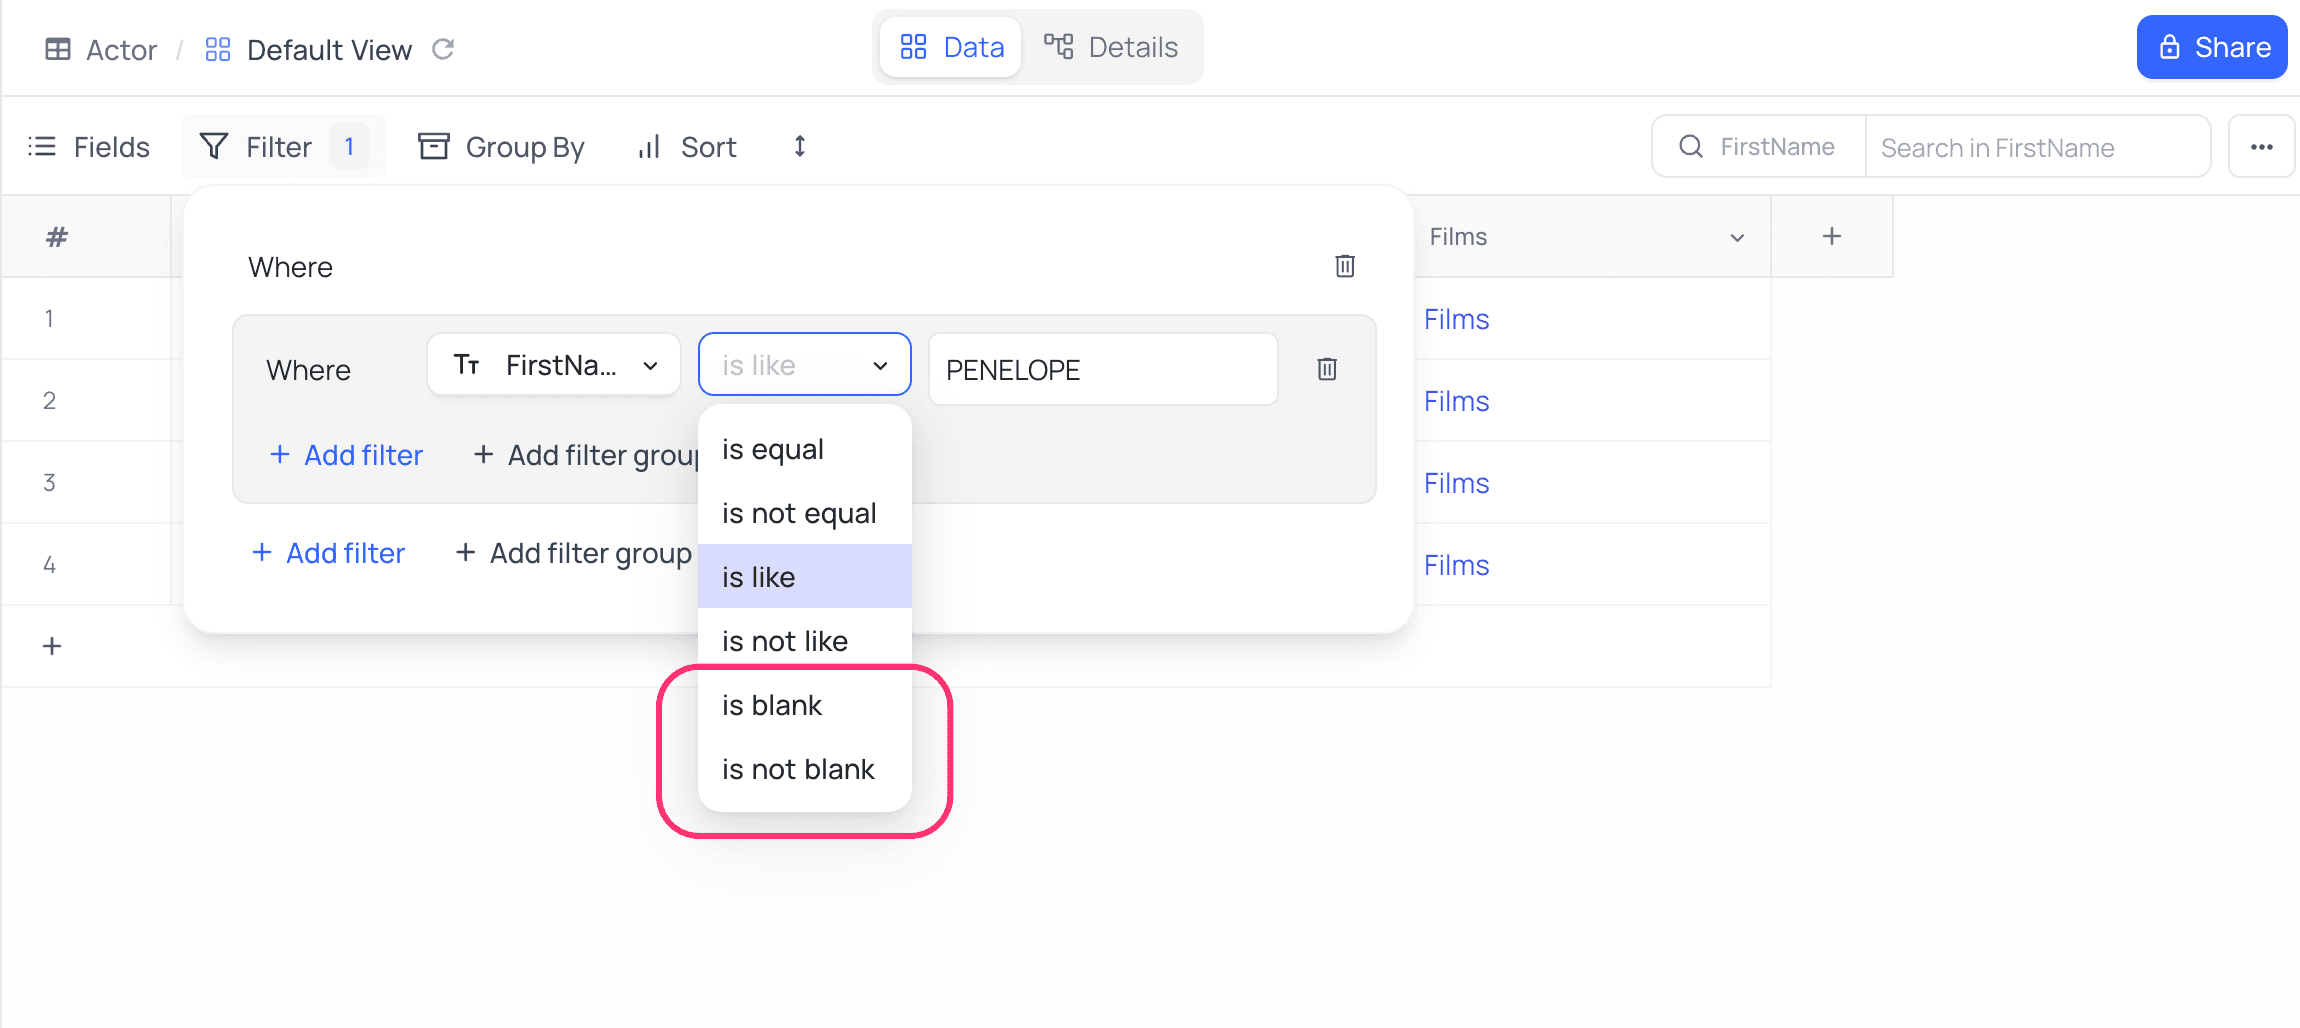
Before enabling the setting:
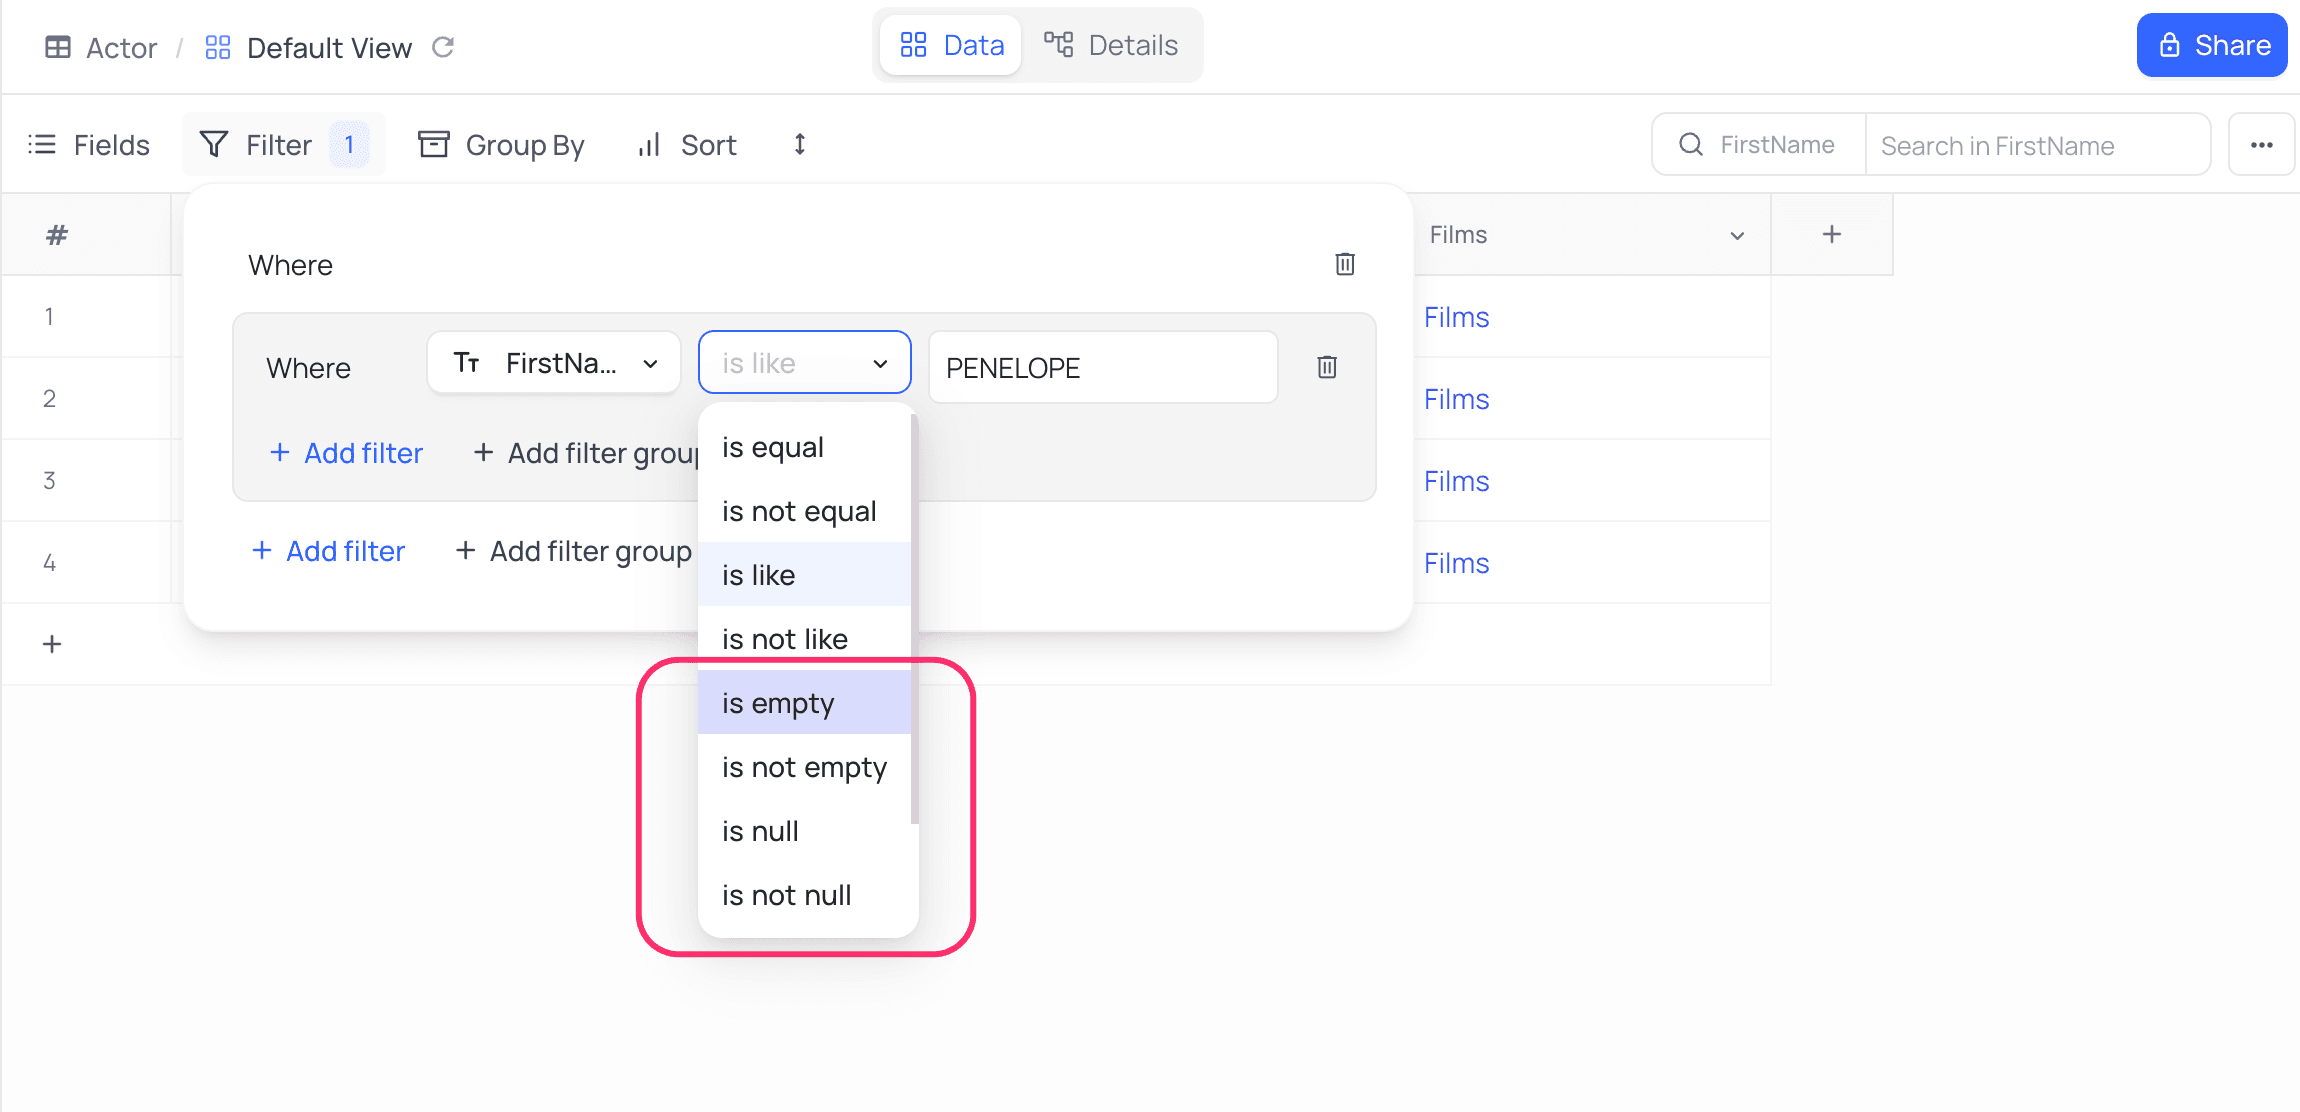
After enabling it, you’ll see additional options like is null and is empty, which let you filter out cells with NULL or empty values.
Alternatively, you can use is blank and is not blank filters to handle both NULL and EMPTY values in a simplified way.